Fire pump systems are the heart of any fire protection system. Even the highest-quality fire pump can fail to perform if the installation sequence on site is poorly planned or incorrectly executed. For contractors, engineers, and project managers, optimizing the fire pump installation sequence is critical to ensuring compliance, reliability, safety, and long-term performance.
This article provides a practical, step-by-step guide to optimizing fire pump installation on site, based on real-world project experience and widely accepted industry standards. Whether you are installing an electric fire pump, diesel engine fire pump, or a complete fire pump package set, following the correct sequence can significantly reduce rework, delays, and operational risks.
Why Installation Sequence Matters in Fire Pump Projects
Fire pump installation is not just about placing equipment in a pump room. It is a coordinated process involving civil works, mechanical installation, electrical connections, control systems, and final commissioning. An incorrect sequence often leads to:
-
Misalignment of piping and pump shafts
-
Insufficient space for maintenance and inspection
-
Electrical rework due to premature cable installation
-
Delays during inspection and acceptance testing
-
Non-compliance with fire codes such as NFPA 20
Optimizing the installation sequence ensures that each step builds logically on the previous one, minimizing conflicts between trades and ensuring a smooth handover.
Step 1: Pre-Installation Planning and Site Readiness
Before any fire pump arrives on site, preparation is essential. This phase is often underestimated, yet it determines the success of the entire installation.
Key preparation tasks include:
-
Confirming approved fire pump drawings and specifications
-
Verifying pump room dimensions, access routes, and ventilation
-
Reviewing applicable fire codes and local authority requirements
-
Ensuring equipment delivery schedules align with site readiness
The pump room must be structurally complete before installation begins. Walls, floors, and ceilings should be finished, and the area should be free of construction debris. Adequate drainage, lighting, and access clearance must already be in place.
Step 2: Foundation Construction and Anchor Bolt Positioning
The fire pump foundation is critical for long-term stability and vibration control. Improper foundations are a common cause of excessive vibration, coupling wear, and bearing damage.
Best practices for foundation installation include:
-
Constructing a reinforced concrete foundation with sufficient mass
-
Ensuring the foundation height matches approved drawings
-
Precisely positioning anchor bolts using templates provided by the manufacturer
-
Allowing adequate curing time before mounting equipment
Never rush this step. Installing a fire pump on an improperly cured or uneven foundation can lead to alignment issues that are difficult to correct later.
Step 3: Positioning and Leveling the Fire Pump and Driver
Once the foundation is ready, the fire pump and its driver (electric motor or diesel engine) should be positioned together as a complete assembly whenever possible.
Important considerations at this stage:
-
Use proper lifting points specified by the manufacturer
-
Place the pump set according to the approved layout
-
Ensure minimum clearances for maintenance and inspection
-
Level the pump base plate accurately in both directions
Precision leveling is essential. Even small deviations can affect coupling alignment and reduce equipment lifespan.
Step 4: Coupling Alignment Before Piping Connection
One of the most common installation mistakes is connecting piping before final alignment. This can introduce unwanted stress on the pump casing and shaft.
Recommended sequence:
-
Perform initial shaft alignment between pump and driver
-
Use dial indicators or laser alignment tools for accuracy
-
Tighten foundation bolts only after alignment is confirmed
Alignment should be checked again after piping installation, but achieving a correct baseline alignment at this stage is critical.
Step 5: Suction Piping Installation
Suction piping has a major impact on fire pump performance. Poor suction piping design or installation can cause cavitation, noise, and reduced flow.
Key suction piping rules include:
-
Install suction piping after pump positioning and alignment
-
Keep suction piping as short and straight as possible
-
Avoid reducers directly at the pump suction flange
-
Ensure pipe supports are independent of the pump
The piping should align naturally with the pump flange without forcing. Any stress transferred to the pump can lead to mechanical failures and inspection rejection.
Step 6: Discharge Piping and Valve Installation
After suction piping is completed and inspected, discharge piping can be installed.
This step typically includes:
-
Installing check valves and isolation valves
-
Connecting test headers and pressure relief valves
-
Ensuring correct flow direction and valve orientation
Discharge piping must also be properly supported. The fire pump should not carry the weight of the piping system.
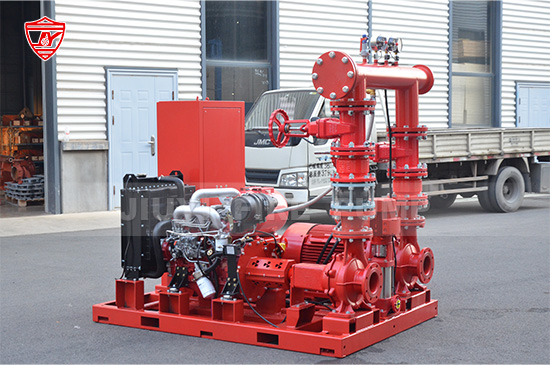
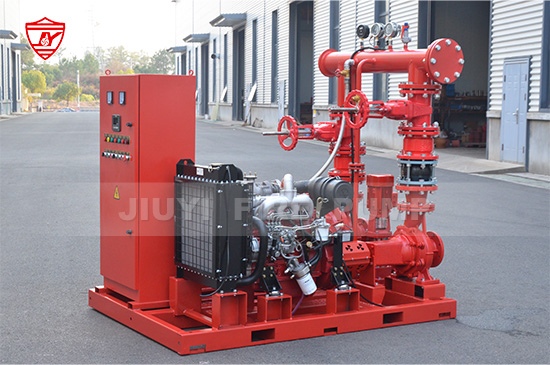
Step 7: Diesel Engine Systems or Electrical Works
The sequence now diverges depending on pump type.
Diesel Fire Pump Systems
For diesel engine fire pumps, install auxiliary systems in the following order:
-
Fuel tank and fuel piping
-
Exhaust system and insulation
-
Cooling system piping and radiator
-
Battery racks and charging system
Ensure sufficient ventilation and exhaust routing to prevent heat buildup and fumes in the pump room.
Electric Fire Pump Systems
For electric fire pumps, electrical work should be performed only after mechanical installation is complete:
-
Power cable routing and termination
-
Grounding and bonding
-
Motor controller installation
-
Control wiring connections
Installing electrical systems too early increases the risk of damage during mechanical work.
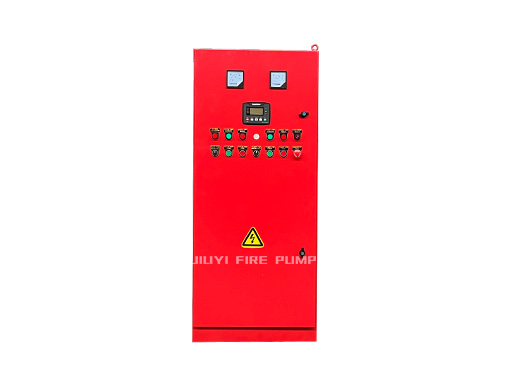
Step 8: Controller, Sensors, and Instrumentation
Fire pump controllers are critical for automatic operation and compliance.
Installation best practices:
-
Mount controllers in approved locations with clear access
-
Install pressure switches, gauges, and sensors according to drawings
-
Verify wiring separation between power and control circuits
At this stage, coordination between mechanical and electrical teams is essential to avoid conflicts.
Step 9: System Flushing and Cleaning
Before commissioning, the entire piping system must be flushed thoroughly.
This step helps:
-
Remove debris, welding slag, and dirt
-
Protect pump impellers and seals
-
Prevent early-stage failures
Flushing should be done before final coupling guards are installed and before formal testing begins.
Step 10: Final Alignment Check and Mechanical Inspection
After piping installation and flushing, recheck shaft alignment. Piping loads, temperature changes, and foundation settling can affect alignment.
Inspect:
-
Couplings and guards
-
Bolt torque values
-
Lubrication levels
-
Cooling and fuel systems
Correct any deviations before proceeding to testing.
Step 11: Commissioning and Acceptance Testing
Commissioning should follow a structured sequence:
-
No-flow churn test
-
Rated flow test
-
Controller functional testing
-
Automatic start and stop verification
All test results should be documented and reviewed before final approval.
Common Mistakes That Disrupt Installation Sequence
Even experienced teams can encounter problems when sequence discipline is not maintained.
Frequent mistakes include:
-
Installing piping before pump alignment
-
Pouring foundations without manufacturer input
-
Energizing electrical systems too early
-
Ignoring clearance requirements
-
Skipping re-alignment after piping installation
Avoiding these errors can significantly reduce project delays and rejection during inspection.
Benefits of an Optimized Fire Pump Installation Sequence
Following a correct installation sequence delivers measurable benefits:
-
Faster project completion
-
Reduced rework and cost overruns
-
Improved system reliability
-
Easier inspection and approval
-
Longer equipment service life
For building owners and operators, this translates into greater confidence in fire protection performance.
Final Thoughts
Optimizing the fire pump installation sequence on site is not optional; it is essential for safety, compliance, and long-term reliability. By following a structured, step-by-step approach and respecting the logical order of mechanical, piping, and electrical works, project teams can avoid common pitfalls and deliver high-quality fire pump installations.
As a fire pump manufacturer, we strongly recommend early coordination between designers, contractors, and equipment suppliers to ensure that every installation follows best practices from foundation to final commissioning. A well-installed fire pump system is not just a regulatory requirement—it is a critical safeguard for lives and property.