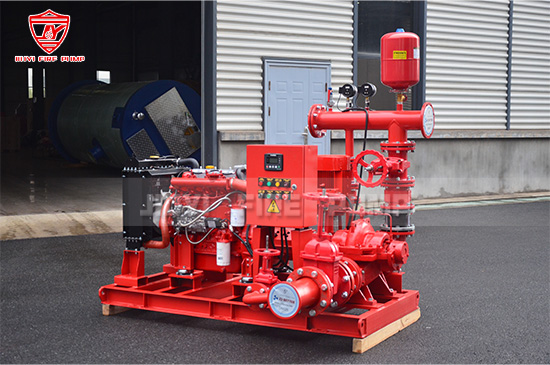
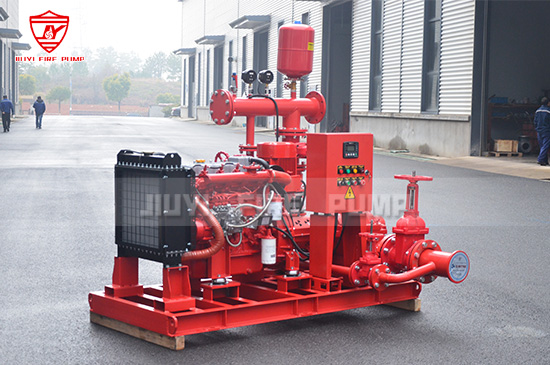
A fire pump run test is a critical part of fire protection system maintenance. Whether required by NFPA standards (NFPA 20 for installation and NFPA 25 for maintenance), or by code authority, a proper run test ensures that the fire pump can deliver required water flow and pressure when needed. In this guide, we’ll walk you through how to test a fire pump correctly—from preparation through documentation—ensuring safety, reliability, and compliance.

Before testing, familiarize yourself with key standards:
NFPA 20 (Standard for the Installation of Stationary Pumps for Fire Protection) includes acceptance testing.
NFPA 25 (Standard for Inspection, Testing, and Maintenance of Water-Based Fire Protection Systems) governs routine testing and maintenance.
Local codes and insurance requirements may stipulate test frequency and documentation.
Failure to adhere to these standards can invalidate your fire protection system and may lead to fines or compromised performance.
Ensure you have:
Manufacturer’s test procedures and pump performance curve.
Test headers, suction and discharge gauges, flow meters, pressure sensors.
Hose connections, orifice plates, test hydrants as appropriate.
Safety gear: gloves, eyewear, hard hats, hearing protection, signage.
A dedicated-qualified technician or service team familiar with fire pumps.
Access to pump room, control panels, and adequate water supply.
Notify stakeholders – inform building management, fire department when required, and any occupants above and near the pump room.
Ensure water supply – verify suction line is open, hydrants or supply source are properly functioning.
Close isolation valves – make sure any non-test-related valves are properly arranged according to test plan.
Inspect equipment – check gauges, sensors, lube oil level, fuel (for diesel pumps), battery (for electric pumps), and controller status.
Review operating procedures – know start/stop method (manual, automatic), flow rates, pressures needed.
Start the pump in the correct mode: manual or automatic.
Watch for proper controller response: “Pump Running” status, alarm panels clear, no unexpected faults.
Once the pump is running, check discharge pressure and suction pressure gauges.
Compare readings to the expected performance curve for zero flow/closed discharge.
Gradually introduce controlled discharge by opening the test line or orifice.
Monitor for steady flow and pressure stabilization. Avoid sudden surges.
At specified flow points (e.g. 30%, 60%, peak flow), record:
Discharge pressure
Suction pressure
Flow rate
Pump speed (RPM)
Total dynamic head
Confirm that readings align with the manufacturer’s curve and NFPA-required performance tolerances.
Let the pump run at each test point for a few minutes.
Observe for unusual vibration, noise, or temperature rise.
Verify lubrication, coupling alignment, and lack of leaks.
Close discharge valves or orifice.
Confirm gauge readings return to no-flow values.
Watch for pump coast-down: ensure it stops as expected and the alarm resets to “Pump Ready.”
For diesel-driven pumps or electric pumps with stored energy backup:
Simulate loss of mains power.
Ensure automatic transfer to backup and pump start within required timeframe (e.g. 10 seconds per NFPA).
Observe performance under load.
Insufficient water supply – suction cavitation or pressure fluctuations result.
Improper gauge calibration – skewed data leads to misinterpretation.
Rushing through stabilization – faulty readings due to incomplete equilibration.
Neglecting temperature rise – overheating can degrade pump life.
Poor documentation – noncompliance with NFPA and audit risk.
Never stand directly in front of discharge opening or gauge under pressure.
Ensure area around discharge piping is secure from splash or high-pressure spray.
Keep flammable substances clear from diesel exhaust, hot surfaces.
Wear PPE: hearing protection when testing high-duty pumps, protective eyewear for discharge testing.
Maintain a structured test report, including:
Date, time, location, tester’s name.
Pump type (electric/diesel), make, model, serial number.
Operating mode (manual/automatic), test configuration.
Gauge calibration dates.
Data table of flow vs discharge/suction vs pressure, plus ambient conditions.
Observations: vibrations, alarms, shutdown behavior.
Pass/fail result based on manufacturer and NFPA tolerances.
Recommendations for next test (e.g. two next annual intervals, intermediate maintenance actions).
Signatures and compliance metadata for audit trails.
If performance is marginal: inspect impeller wear, mechanical seal, bearings, coupling misalignment.
Adjust controller settings if necessary.
For failures, coordinate repair with manufacturer-certified service team.
Schedule repairs and retest promptly to maintain compliance.
Review standards and documentation (NFPA 20, 25).
Notify stakeholders, prepare site and equipment.
Start pump, record zero-flow data.
Introduce flow, record data at intervals, check stability.
Monitor start-up, coast-down, and backup power transfer.
Inspect for anomalies and safety.
Document thoroughly and analyze results.
Follow up with maintenance or repairs as needed.

Executing a fire pump run test correctly is not only a regulatory necessity—it’s a critical assurance of life safety and system reliability. With a detailed step-by-step process, rigorous safety practices, and thorough documentation, you can ensure your fire pump operates as designed when it matters most. Empower your service team and stakeholders with this procedure to boost confidence, compliance, and peace of mind.