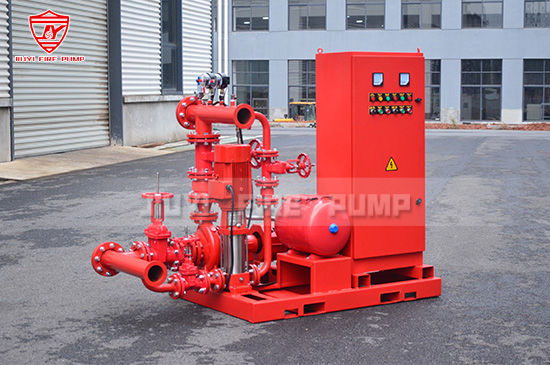
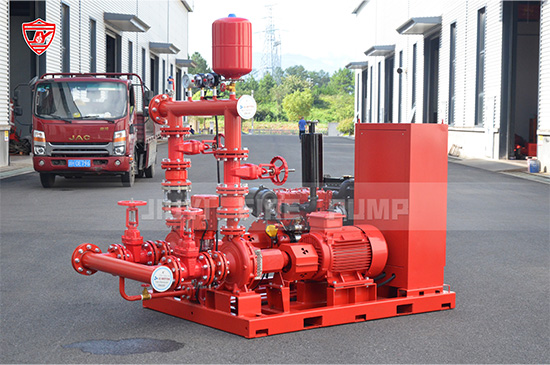
Fire pump systems are critical life-safety components for many buildings—supplying the necessary pressure and flow when normal water mains cannot meet demand. Commissioning your fire pump system correctly ensures it meets design requirements, performs reliably during emergencies, and complies with NFPA standards (NFPA 20, NFPA 25). In this guide, we walk you through the essential steps to conduct fire pump commissioning successfully—from pre-startup checks to final acceptance and documentation.

Gather all project documents: approved shop drawings, specifications, piping and electrical schematics, control panel layouts, and manufacturer manuals. Review relevant standards such as NFPA 20 (Installation of Stationary Fire Pumps), NFPA 25 (Inspection, Testing, and Maintenance of Water-Based Systems), and local codes.
Engage key stakeholders early: fire pump manufacturer or representative (you), testing contractors, installing contractor, fire protection engineer, and authority having jurisdiction (AHJ). Assign roles clearly to coordinate tasks efficiently and ensure compliance.
Inspect the physical setup:
Ensure proper mounting, anchoring, and alignment of pump(s).
Confirm piping—suction & discharge—is correct, supported, and clear of leaks.
Verify suction supply—backup tanks, jockey pump, strainers, air release valves.
Confirm electrical connections, motor alignment, voltage, and phase rotation.
Review instrumentation—gauges, flowmeters, pressure sensors, switches.
Check control systems: starting circuitry, jockey pump, alternator (if present), alarms, and interlocks.
Document all pre-startup findings. Clear any deficiencies before proceeding.
Power the motor briefly (jockey only) to verify correct rotation. Reverse if needed—wrong rotation can damage impellers or reduce performance.
Perform a dry-run at low speed if your tooling allows, checking for unusual vibrations, noise, or overheating.
Ensure bearings and mechanical seals are properly lubricated per manufacturer instructions. Run the pump under no-flow conditions briefly to seat the bearings and proceed through the initial break-in phase.
Connect discharge piping to a test header or controlled outlet. Use calibrated instruments to confirm that the fire pump meets or exceeds both rated flow @ rated pressure and best efficiency point (BEP) where applicable.
Plot your performance curve (if possible) to assess pump behavior across flow rates, ensuring compliance with design targets.
Calibrate the jockey pump to maintain system pressure during idle periods. Set:
Rise cut-in pressure (typically 10 psi above system pressure).
Cut-out pressure (typically at system design pressure).
Ensure the jockey doesn’t run too frequently—verify system is appropriately pressurized and leak-tight.
Test automatic start scenarios:
Simulate low suction tank levels (if applicable).
Use pressure drops.
Manually start the pump via control panel.
Confirm proper operation of starter, control circuits, local/remote fire alarm interfaces, pressure-shutdown interlocks, automatic transfer if generator-backed, and indication lights/sounds.
Test all alarm functions:
Fire pump running alarm (local and remote).
Low suction pressure alarm.
Failure-to-start or manual stop alarm.
Jockey pump fault alarm.
Simulate fault conditions—e.g., fuse removal, suction blockage—and check alarm annunciation to fire control panels and responding parties.
Verify emergency shutdown procedures:
Manual emergency stop (E-stop).
Fire brigade connection operation and override functions (if installed).
Ensure instructions are posted clearly on or near the panel.
Document all commissioning steps:
Pre-startup findings and corrections.
Rotation and lubrication checks.
Performance test results (flow, pressure, efficiency).
Jockey pump calibrations.
Starting sequences, alarm testing, and shutdown testing.
Compile as-built documentation, functional test logs, instrument calibration certificates, and any deviation notes.
Provide a commissioning certificate signed by the manufacturer’s representative, installing contractor, and owner/AHJ sign-off.
Complete training for facility operators and maintenance staff:
Manual and automatic pump startup/shutdown.
Jockey pump adjustments.
Alarm recognition and response.
Emergency procedures during fire events and routine maintenance schedules.
Give them the operation & maintenance manuals, performance curves, and test logs.
Recommend routine testing per NFPA 25 guidelines:
Weekly churn tests (jockey + fire pump priming).
Annual full flow tests.
Periodic lubrication, visual inspections, vibration analysis.
Spare parts planning to minimize downtime during service.
| Pitfall | Solution |
|---|---|
| Misaligned shafts or improper coupling installation | Use dial indicators; follow shaft alignment procedures |
| Suction supply cavitation or entrained air | Guarantee proper suction design—check valve, air release, strainer |
| Incorrect motor rotation | Dry-run test; reverse wiring if needed |
| Inaccurate instrumentation | Use calibrated, traceable gauges; zero and span before testing |
| Jockey pump cycling due to leaks | Repair leaks; optimize system pressure setpoints |
| Poor documentation | Use detailed, standard test forms and sign-off sheets |
| Lack of operator training | Schedule hands-on sessions and provide clear manuals |

Project: 500 gpm 175 psi diesel engine fire pump for a multi-storey plant.
Pre-startup: Found miswired phase rotation—corrected.
Performance: Achieved 520 gpm at 180 psi.
Jockey: Set to 120 psi cut-in and 130 psi cut-out, cycling reduced to once per hour post-commissioning.
Alarms: Low suction triggered correctly, with full annunciation to monitoring.
Documentation: Full test log delivered; operator training completed; maintenance schedule established.
Result: Approved by AHJ with zero punch-list items.
A successful fire pump commissioning process combines meticulous preparation, standardized testing, precise documentation, and thorough training. By carefully managing each stage—from pre-commissioning through performance validation to handover—you ensure your system performs reliably when safety is paramount. This not only satisfies regulatory requirements but also delivers peace of mind to building owners, facility managers, and, most importantly, emergency responders in real-world emergencies.